Electronics with a Personal Touch, the Hard Way and the Easy Way
14 years later, the process of creating custom PCBs hasn't changed much. It is still error prone, and the learning curve is steep. Now comes Wokwi...

I still remember my first time designing a Printed Circuit Board. It was back in the summer of 2005, when a friend introduced me to a new microcontroller, the PIC18F4550. Two things got me excited about that little fella:
1. It could speak USB! That was a huge upgrade compared to the wires running from my computer's parallel port to the microcontroller I used before.
2. Microchip was sending free samples. I could get a few pieces just by going online and filling a short form. Obviously, I had to give it a go!
A few week later the chips arrived and I started tinkering with them. I soldered a few wires to a USB connector and built a small circuit in a breadboard. It took a few more days until I had the setup I wanted - a chip I could easily reprogram over USB, and had a firmware that would allow me to control GPIOs and speak various protocols such as I2C and SPI. Achievement unlocked!
From Breadboard to PCB
Later that month, the same friend told me he made a PCB for an audio amplifier project he was working on. I was very intrigued and asked him to teach me how to design and make my own PCBs. He told me to start by installing Eagle, and then briefly explained the steps to me. I managed to find a copy of our chat history:
Me: eagle @ here, running Version 4.13 for Linux
Me: do me a short tutorial
Eran: no, search google. there r good tutorials
Me: just tell me what to do to start a new PCB, from there i'll get along
Eran: u do schematic first, then u press icon that switch u to board view
Eran: and place the parts on the board
Uri: I connect 2 components using 'wire' ?
Eran: yes
The rest of that convo might be challenging to follow, as we mixed Hebrew with English (we loved chatting like that back in the day), but you can pick up my frustration with figuring out the right connect part from the large library Eagle had:
Me: yesh eize 1000 kinds of connectors, how will I find the relevant ones ?
Eran: known problem :)
Me: ma osim
Eran: waste time :/
Me: lo tov, nasim stam mashu
Eran: ma yazor stam
Eran: zarich decide al connector ve az find mashu she fit et ze
It took me a few weeks of experimentation to figure out how to use the software, to find all the parts, but eventually I managed to capture the schematic of my project:

Several hours later, I also had the board laid out. I couldn't route all the wires in a single layer, so you can see a yellow "air wire" dangling there:

Let's Etch Some Copper!
As I had a finished design, I asked my friend what the process of making the PCB looked like. He described the process to me:
- Print the copper traces on a transparency paper using a Laser printer
- Get a copper PC board, clean it with alcohol
- Transfer the toner from the transparency paper to the copper board using an iron
- Etch the copper PC board in a ferric-chloride solution and wait for 10-15 minutes
- Remove the board from the solution, wash it, and clean the remaining toner by rubbing with alcohol
- Drill holes for components
It did sound like a lot of work, but I was determined to try it out. I bought some transparency papers and a copper PC board, got some FeCl granules from my friend, and spent an evening trying to turn my design into a tangible product.
The toner transfer didn't go very well, but I used a marker pen I had to complete the broken traces, as well as add the date, as you can see in the photo below:

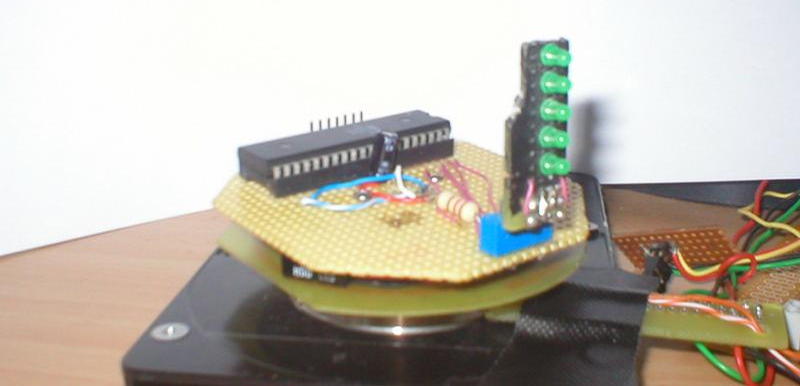
After fixing one short, soldering all the components, and putting the chip in, I plugged it into my computer, and magic smoked appeared!
Actually, there was no magic smoke, opposed to what I was expecting. The board appeared as a serial port on my computer, and was pretty usable, except for occasional resets when I touched the board. I noticed that touching pin 38 (PGM) caused these resets, and fixed it by grounding that pin.
Hooray! I created a functional, USB-programmable board I could use for prototyping my next projects! The whole process took roughly 3 months, I learned a lot, and was really happy with the final result:

In a retrospect, it seems like I really wanted something like Arduino, but it didn't exist at the time, so I built it. Coincidentally, Arduino was also created around the same time!
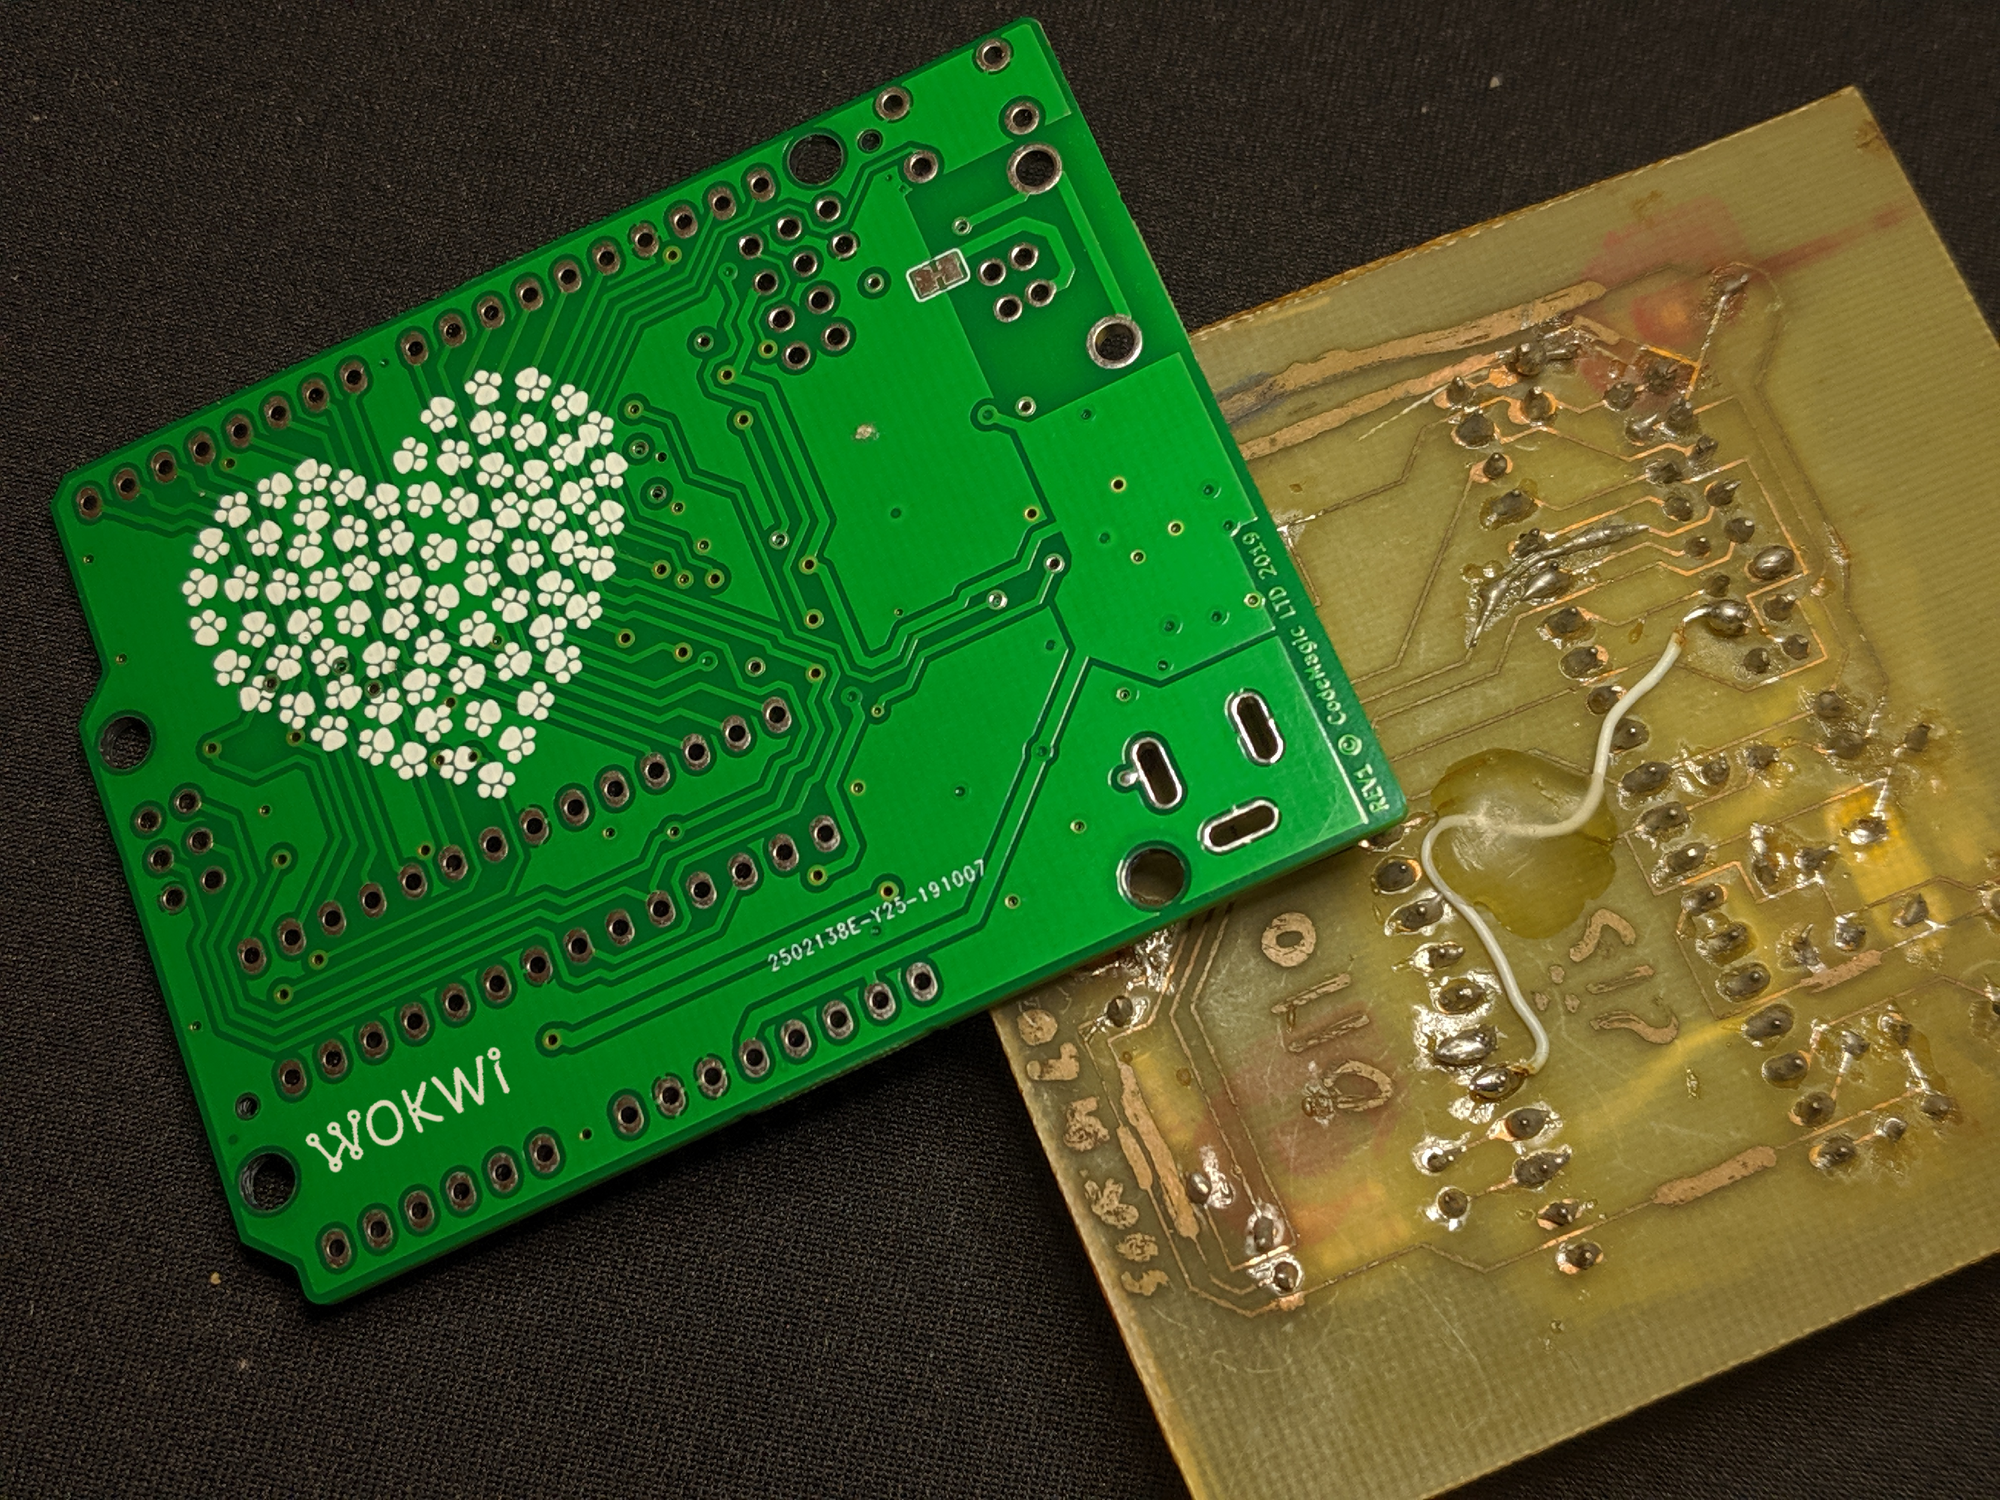
Creating Custom PCB Shouldn't Be So Hard!
14 Years later, the process of creating custom PCB hasn't changed much. Sure, you can now get your board manufactured in China for a few bucks, and there are so many great tutorials, and there are some online tools for PCB design, but the process is still very error prone and the tools have very steep learning curves.
That's the reason why I started Wokwi. Wokwi is a service which let's you create custom boards without having to worry too much about the board layout, choosing and sourcing the right components, footprints, assembly, boot-loading or anything else. You simply design your board in a visual editor, and get it delivered to you, assembled, programmed and ready to use!
For starters, you can design an Arduino Uno compatible board and personalize it by adding custom text and graphics on either side of the board, as well as choosing the colors for the each of the LEDs, the power jack, and the shield connectors.

This is just the beginning, of course - I hope to add many more boards and shields down the road, extend the range of possible customization options, and provide a true What You See is What You Get (WYSIWYG) experience to fellow makers creating their first electronics project.
Go and check out the new project at Wokwi.com, and if you like it, make your first order. You can also shoot me an email with your feedback and requests, or leave a comment below!
Update: since writing this post, the focus for Wokwi has changed. We no longer do custom PCBs. Instead, we let you simulate Arduino code right in the browser!